Thursday, 12 January 2017
Tuesday, 20 December 2016
Make Handmade Christmas Decorations from Sparkly Scraps
Would you like to make these simple Christmas decorations using craft box scraps?
Here's how it's done:
I made them both following the same principles.
Firstly, make a cone shape using sequin film.
Thread a section of wire through the cone opening, leaving enough length on either side to manipulate into a hanging loop at the top and fashion into fairy legs or a tree trunk at the bottom.
Attach fringing to the inside of the wide cone opening. Double sided tape works great on sequin film. Now for the fun decorating bit!
For the fairy i over layered the cone with some sequin waste punchinella which created a cute pattern for the fairy dress. I made her a sparkly pair of shoes and matching cloak made from glitter fabric, topped with little paper hands holding a heart shaped acrylic stone. Using sequin film again, i cut out some fairy wings opting for the ethereal 'Oriental' transparent film with a subtle AB finish. Then decorated them with sequins and used a paper punch to cut out a delicate wing pattern. For the face, i snipped the top off the cone and replaced it with a smaller flesh coloured card cone. Here i used small sequins cut in half for the eyes and tiny ones for cheeks and lips. I glued it all together using a glue gun and then topped her of with a main of damson and lilac feathers!
This fairy is ready to party; I love her skinny wire legs and sparkle shoes captured mid prance!
For the tree i decorated the cone with sequins gluing the centre in place and bending the tips to make them 3D. Then i glued on some glitter fabric circles, sequins and a bow. I finished the wire with a glitter fabric plant pot at the bottom and threaded a star shaped bead through the top.
Both decorations are super cheap to make and can be embellished with any sparkles you have in your craft box. Get creative and enjoy yourself!
Here are a few snaps of them on my tree...
Merry Christmas from Team JR!
Sunday, 4 December 2016
Handmade Christmas Card & Tag Ideas Using Ribbon & Craft Left Overs
As any enthusiastic crafter knows, we can't throw anything away and our craft stash is practically bursting at the seams! If anybody knows about being buried alive in buttons, bling, bits and bobs all tied in a pretty bow its us! Well, here we are sharing some ideas to help you use up your ribbon scraps, check out these cute Christmas cards crafted by the JosyRose team. We simply rifled through (some) of our scraps and off cuts, separating them into bundles of festive complimentary colours. With our red and green pile of ribbons, cards, bows, trims and stray buttons we made these, we hope you like them.
First we made this super simple, yet effective, Christmas tree ribbon card:
![]() |
| Christmas Tree Ribbon Card |
- Simply cut some card into a large triangle. Fold it in half again and let it fall open.
- Now cut and tape your chosen ribbon off cuts horizontally across the opening.
- Overlay another piece of card on the outside (we chose to use a contrasting colour to the inside), and sandwich the raw edges of your ribbons etc neatly underneath.
- Finish off with any spare buttons, sequins or bows to 'decorate' the ribbons branches.
Here we created this simple bauble shaped card which would also make a very fancy festive tag too!
![]() |
| Christmas Bauble Tag |
- Simply draw around a cup or small plate, depending on the size of your scrap card, leaving a small wide oblong on top to attach them together.
- Cut it out twice, using the first piece as a template for the second piece.
- Horizontally attach some ribbons to the front using double sided tape.
- To make the hanging loop, sandwich a piece of ribbon between both pieces of card and glue the card together at the oblong point.
The combinations and creativity is endless. Just have fun!
Merry Christmas x
Sunday, 27 November 2016
Christmas Card Inspiration Using Glitter Fabric Die Cut Applique
![]() |
| Cute Christmas Cards Featuring Glitter Fabric Applique, Die Cut by Team JR! |
We've had some fun getting creative with our Christmas themed die cut applique, made from our ever glamorous and popular glitter fabric. Designed and manufactured by JosyRose in our London factory.
Each pack of glittery festive die-cuts includes: gift, reindeer, bauble, snowman, stocking and Santa. Every set contains both the positive and negative silhouette shapes - totalling 12 die cuts to use on Christmas cards, decorations and gift-wrap for only 25p each!
![]() |
| Gift Shaped Glitter Die Cut |
![]() |
| Snowman Shaped Glitter Die Cut |
Loving all things sparkly, we couldn't stop there! So we embellished the silhouettes with ribbons, sequins, diamante, buttons, wire and beads to make some festive Christmas cards.
What do you think?
What will you make?
Please do share your Christmas crafty creations with us, we would love to see!
Visit JosyRose.com or follow this link to check out these gorgeous glitter applique:
Saturday, 19 November 2016
Stunning Stud Embellished Candle Centre Piece
This is a very easy way to make an original & striking candle centrepiece
Preparation
Choose a nail head with prong backs & diamante set in metal claw backs.
Select your candle & satin ribbons in complimentary colours.
Guide
- Using the candle as the base, simply push the prongs of the nail heads and claws of the diamante securely into the wax
- Following the top rim of the candle create one row of alternating nail heads & diamante
- Measure a strip of 15mm satin ribbon around your ribbon. Apply double sided tape to the reverse & cut the ribbon to length adding a 1cm overlap for the join
- Repeat the above step using 7mm ribbon in an alternating complimentary colour, making sure that the seams line up
- Repeat step 2 following the edge of the ribbon to achieve a straight line
- Add one row of square nail heads leaving a small gap between each
- Repeat step 4 using the edge of the square nail heads as a line guide
- Starting from the bottom of the candle, repeat steps 1-7 again until you have two equally sized/spaced blocks of embellishment with a large gap in the centre
- Select a wide satin ribbon and tie in a decorative bow. Snip the ends into points using a sharp pair of scissors
Tip: If you wish to create a distinct pattern, score the design into the wax with a pin before you start.
Products Information
Jr05370 Gilt SquareBrushed Nail Heads.
Jr05422 Gilt Seed PodRound Nail Heads
Sunday, 13 November 2016
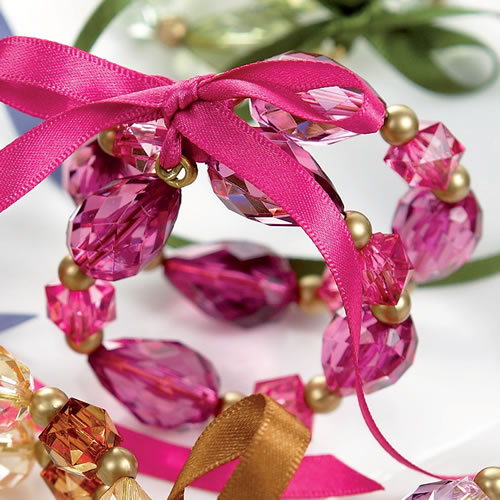
Craft Cheats Beautiful Beaded Napkin Rings
Preparation
- Choose one of the colour combinations from our beautiful collection of pre-beaded wires. These cheap & cheerful pre-beaded wires can be used as bag handles, curtain tiebacks, jewellery… the choice is yours!
- Choose any ribbon that is approximately 7mm wide. Cut ribbon to approx 30cm
Start
- Bend the wire twice round into a circle so that the end loops are in line with each other with one small matte gold bead in-between
- Using a pair of round nosed pliers, slightly open the end loops out enough to easily thread through your ribbon of choice
- Thread the ribbon upwards through the bottom loop over the back of the matt gold bead. Then bring the ribbon down over the front & twist back around the reverse of the bead & then up again through the top loop
- Bring the ends of the ribbon together at the front of your napkin ring & tie into a decorative bow. Snip the ends of the ribbon to tidy up any fraying
Tip: I have teamed together complimentary ribbons to match the colour of the beads. You could try using contrasting colours for a whole different effect. Red ribbon on green beaded napkin rings would look fab on the Xmas table!
Products Used
Jr01812 Peach & Topaz Beaded Wire £1.90 each
Jr01813 Grey & Topaz Beaded Wire £1.90 each
Jr01814 Olive Beaded Wire £1.90 each
Jr01813 AmethystBeaded Wire £1.90 each
Jr03857 Blackberry Satin Ribbon. 7mm £0.21 per metre
Jr03863 Moonlight Satin Ribbon. 7mm £0.21 per metre
Jr03845 Cypress Satin Ribbon. 7mm £0.21 per metre
Jr03824 Sable SatinRibbon. 7mm 0.21 per metre
Sunday, 16 October 2016
How to Make a Halloween Trick or Treat Candy Collection Tub
Who says Halloween can't be glam?
Preparation
Sandwich back-to-back, sparkly side out, 2 sheets of A4 orange & black glitter fabric. Glue in place.
With a standard hole punch, cut out one row of holes along one long edge. This will form the rim of your tub, where you thread the ribbons through.
Cut a mixture of orange, black, purple & green ribbons to different lengths.
Thread decorative beads onto a piece of strong malleable wire to make a handle.
On the reverse of a piece of glitter fabric draw a circle using a compass set at 57.10mm mm radius. Cut the circle out of the fabric with a pair of sharp scissors. Draw another circle in the middle - compass setting: 47.10mm. Now, at 1cm intervals cut from the outside edge inwards to the inner circle/line creating a fringe. This will form the base of your bucket.
![]() ![]() |
Start
Glue our black distressed lace trimming around the long edge of the glitter fabric sandwich which has the holes
Tie the contrasting ribbons through the holes & knot in place.
Bend the fabric round so that the ends butt together to create a cylinder shape. Glue into place and cover join with a piece of decorative ribbon
Now slide the base into place & fold the cut sections up onto the inside cylinder walls. Glue in place.
Thread the handle through opposite points of the ribbon rim and tie in place.
Finish the rim off with a row of black & white strung sequin. Glue in place.
Top off with an oversized orange plastic button


Tip: It doesn’t matter if the ribbons fray – this will add to the look!
All items available from JosyRose.com
Subscribe to:
Posts (Atom)
JR Blogs
- Feb 17 (2)
- Feb 21 (1)
- Mar 24 (1)
- Apr 25 (1)
- Jun 03 (1)
- Jul 06 (1)
- Jul 21 (1)
- Aug 31 (1)
- Sept 07 (1)
- Oct 25 (1)
- Nov 15 (1)
- Dec 06 (1)
- Jan 10 (1)
- Feb 10 (1)
- Mar 08 (1)
- Apr 11 (1)
- May 11 (1)
- Jun 14 (1)
- Jul 11 (1)
- Aug 13 (1)
- Sept 18 (1)
- Oct 17 (1)
- Nov 01 (1)
- Dec 07 (1)
- Jan 08 (1)
- Feb 13 (1)
- Mar 21 (1)
- Apr 04 (1)
- May 21 (1)
- Jun 20 (1)
- Jul 24 (1)
- Aug 07 (1)
- Oct 16 (1)
- Nov 05 (1)
- May 21 (1)
- Jun 05 (1)
- Jul 08 (1)
- Aug 06 (1)
- Sept 01 (1)
- Oct 01 (1)
- Nov 01 (1)
- Dec 01 (1)
- Jan 01 (1)
- Feb 02 (1)
- Mar 02 (1)
- Apr 01 (1)
- May 18 (1)
- Jun 01 (1)
- Jul 01 (1)
- Aug 01 (1)
- Sept 01 (1)
- Oct 01 (1)
- Nov 01 (1)
- Nov 30 (1)
- Dec 01 (1)
- Dec 07 (1)
- Jan 10 (1)
- Feb 08 (1)
- Feb 22 (1)
- Oct 16 (1)
- Nov 13 (1)
- Nov 19 (1)
- Nov 27 (1)
- Dec 04 (1)
- Dec 20 (1)
- Jan 12 (1)
- Jan 15 (1)
- Jan 22 (1)
- Feb 19 (1)
- Mar 14 (2)
- Mar 21 (1)
- Mar 23 (1)
- Apr 01 (1)
- Apr 11 (1)
- Apr 27 (1)
- May 02 (1)
- May 14 (1)
- Jun 07 (1)
- Jul 04 (1)
- Sept 28 (1)
- Nov 09 (1)
- Feb 14 (2)
- Feb 07 (1)
- Apr 03 (1)
- Jul 23 (1)
- Feb 13 (1)
- Apr 28 (1)
About JosyRose.com
- JosyRose.com
- JosyRose is an online boutique, catering for all your contemporary fashion, interior and crafty needs! We sell all the essential sparkling finishing touches you just can't seem to source on the high street. On-trend fashion motifs to funky feather trims. The perfect place to customise any hand-made project. Our collection covers haberdashery classics, craft, fashion, soft furnishings, scrapbooking, stage and jewellery making! x